
Introducing, the vinyl book cover and how to apply it!
Printed Vinyl Book Covers are going to change your life! They are easy to apply with no sellotape or additional plastic covering required. The vinyl sticks easily to the surface of the book much
Happy New Year! Dismiss
Skip to content

Vinyl wraps are a popular way to transform appliances like fridges, giving them a fresh, modern, or custom look without the permanence of paint. Vinyl’s special adhesive makes it easy to apply, reposition, and remove, allowing for endless creativity.
Each vinyl wrap consists of two layers: the backing liner and the vinyl itself. Unlike decals with application tape, fridge wraps are applied as one solid piece. Below are seven easy steps to apply vinyl wraps to an appliance like a fridge using the wet method:
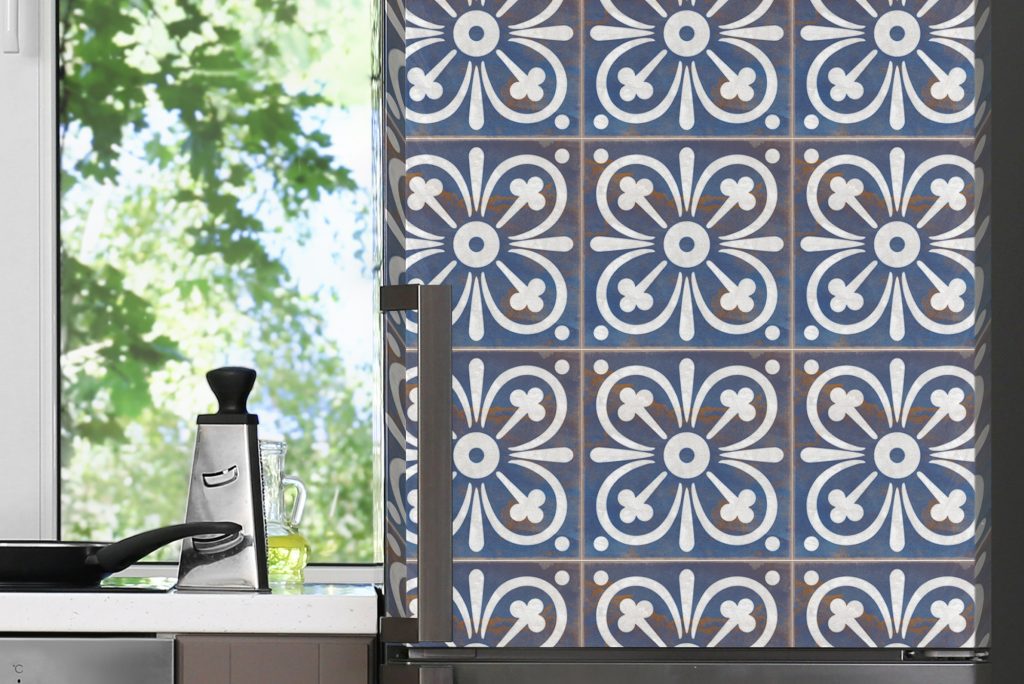
Vinyl decal applied to a fridge
A smooth, dust-free surface is essential for a flawless application. Use a mild cleaner or a mixture of soapy water to remove dirt, grease, and debris. Avoid cleaners with wax or oil, as they can prevent proper adhesion. A lint-free cloth works best for drying the surface. Read more on preparing your surface area.
For the wet application method, mix a few drops of dish soap with water in a spray bottle. A tablespoon or two of soap per liter of water is sufficient. This solution allows the vinyl to be repositioned and helps prevent air bubbles.
At this stage, prepare a squeegee or an alternative tool like a credit card wrapped in a soft cloth to prevent scratches.
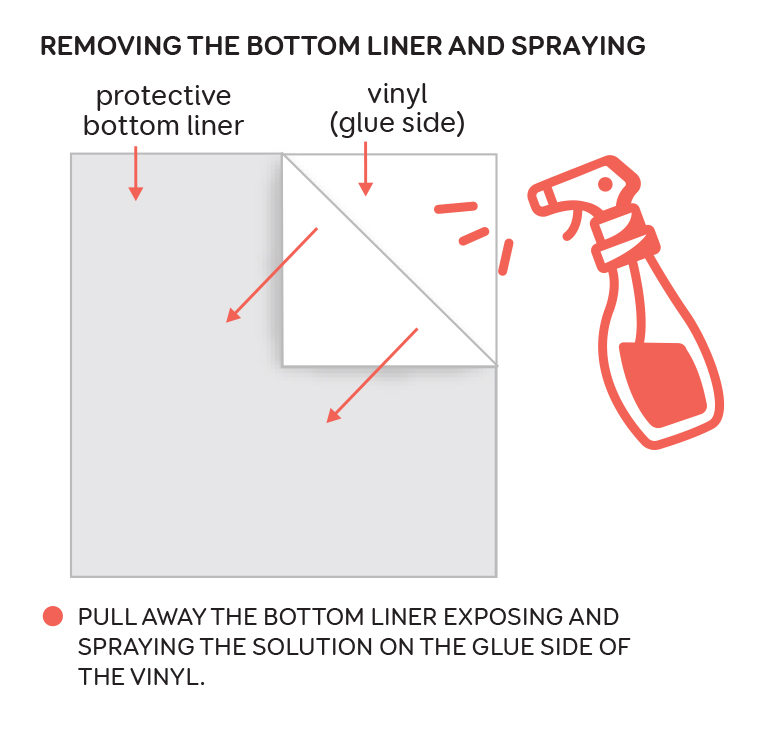
Lay the vinyl face down on a clean, flat surface (avoid carpets, as fibers can cling to the adhesive). Slowly peel back the protective liner while spraying the adhesive side with your soapy water solution. Apply enough spray so the vinyl won’t stick to itself if it folds, but avoid oversaturating the liner, as it may tear.
Spray the fridge surface with the same solution. Position the wet vinyl onto the fridge. The moisture allows you to adjust and slide the vinyl easily. Smooth out creases gently while positioning, but don’t press it down firmly until you are happy with the alignment.
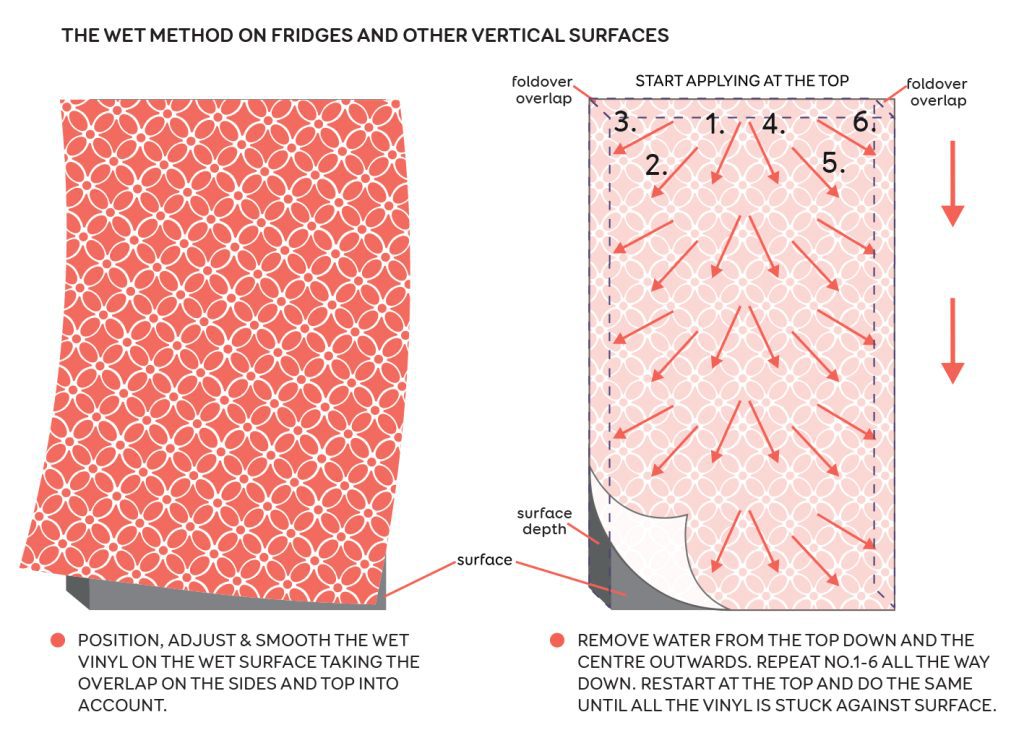
Once positioned, start applying the vinyl from the top down, pressing firmly from the center outward. Avoid starting at the edges, as this can trap water and air.
Use your squeegee to work water and air bubbles out from the center toward the edges. Apply firm, even strokes until the vinyl is flat. On vertical surfaces, water will run downwards, so drying may happen faster. If the vinyl feels too wet and shifts easily, allow it to dry for a few hours before trimming.
Tip: If your fridge has a handle, continue to Step 5. If not, skip to Step 6 on foldovers.
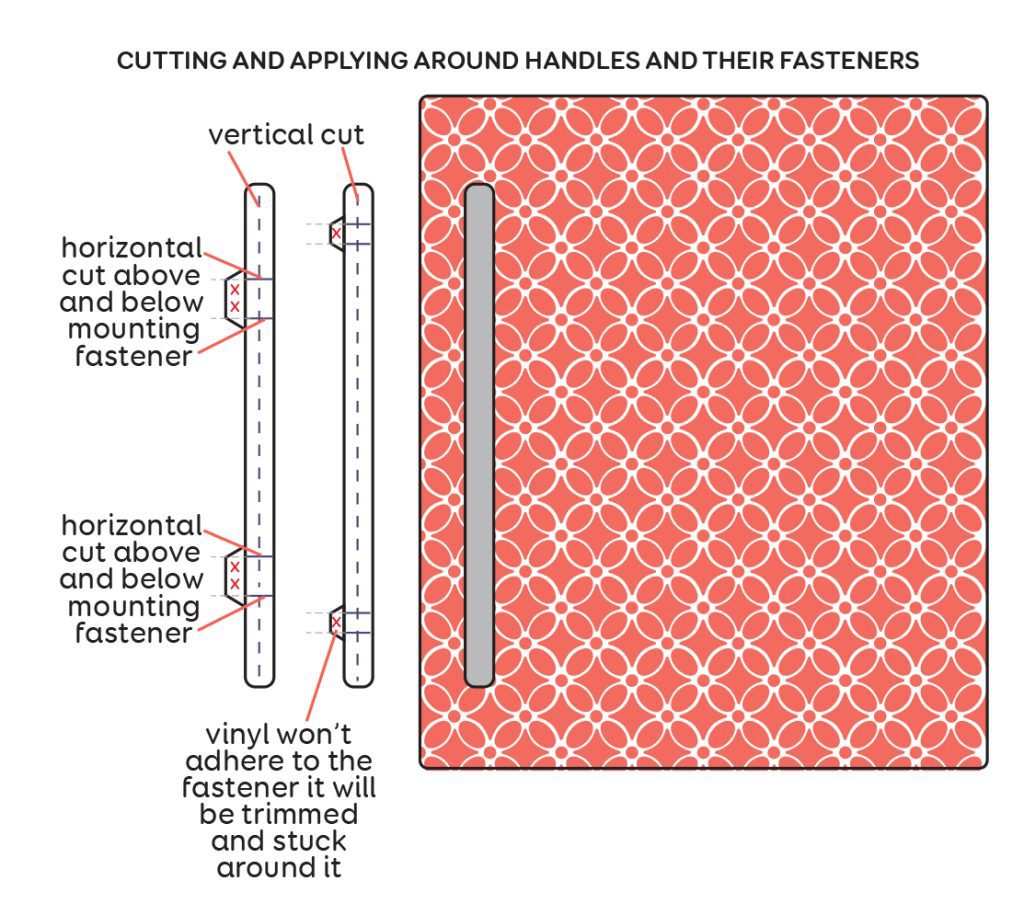
Whenever possible, remove fridge handles before applying vinyl. If that’s not an option:
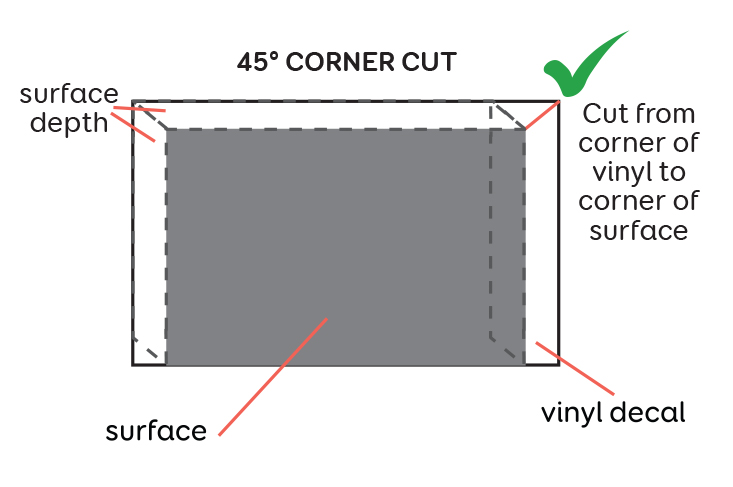
When wrapping vinyl around the sides or edges of a fridge door, follow these tips for a neat finish:
Allow the vinyl to dry and bond properly before trimming. Once fully dry, carefully trim away any excess vinyl with a precision knife. Check for trapped air bubbles — small ones often disappear as the adhesive cures, but larger ones can be pricked with a pin and smoothed out.
For best results, avoid cleaning or exposing the fridge to excess moisture for 24–48 hours after wrapping to allow the adhesive to cure completely.
Spray or paint a clear lacqueur over the finish to increase it’s longevity. Something like Q30 protective film will guard against scratches and stains, helping the print withstand frequent use. Test on a scrap piece of vinyl or a small area first.
By following these steps, you’ll achieve a professional-looking vinyl wrap on your fridge, giving it a brand-new look with minimal effort.
Printed Vinyl Book Covers are going to change your life! They are easy to apply with no sellotape or additional plastic covering required. The vinyl sticks easily to the surface of the book much

Vinyl is a printable sticker material that has adhesive on the back which makes it easy to apply on any surface. Vinyl stickers are also known as sticky vinyl, vinyl decals or die-cut stickers.

Vinyl decals are a new trend and are being applied to many surfaces. Vinyl has an inherently special adhesive and can be applied to many surfaces such as glass, wood, metal, or plastic. They