
7 Easy Steps for Wrapping a Fridge
Vinyl wraps are a popular way to transform appliances like fridges, giving them a fresh, modern, or custom look without the permanence of paint. Vinyl’s special adhesive makes it easy to apply, reposition, and
Happy New Year! Dismiss
Skip to content

Printed Vinyl Book Covers are going to change your life! They are easy to apply with no sellotape or additional plastic covering required. The vinyl sticks easily to the surface of the book much like DC-fix clear film. Here are the 8 easy steps to follow to apply Vinyl Book Covers.
To ensure the optimum outcome of the book-covering project, clean the area of dust and small particles. These could land up in between the vinyl and the book and damage the vinyl while you’re applying.
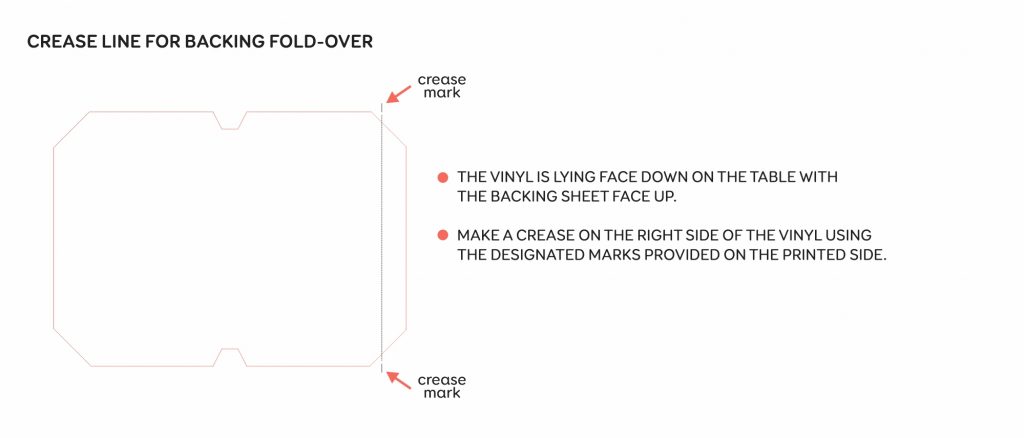
The vinyl is lying face down on the table with the backing sheet face up. Make a crease on the right side of the vinyl using the designated marks provided on the printed side.
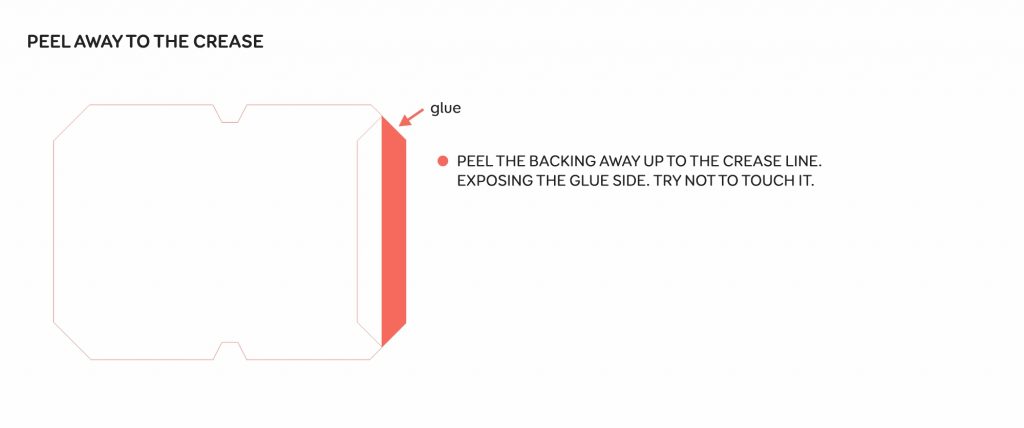
Peel the backing away up to the crease line. Exposing the glue side. Try not to touch the glue.
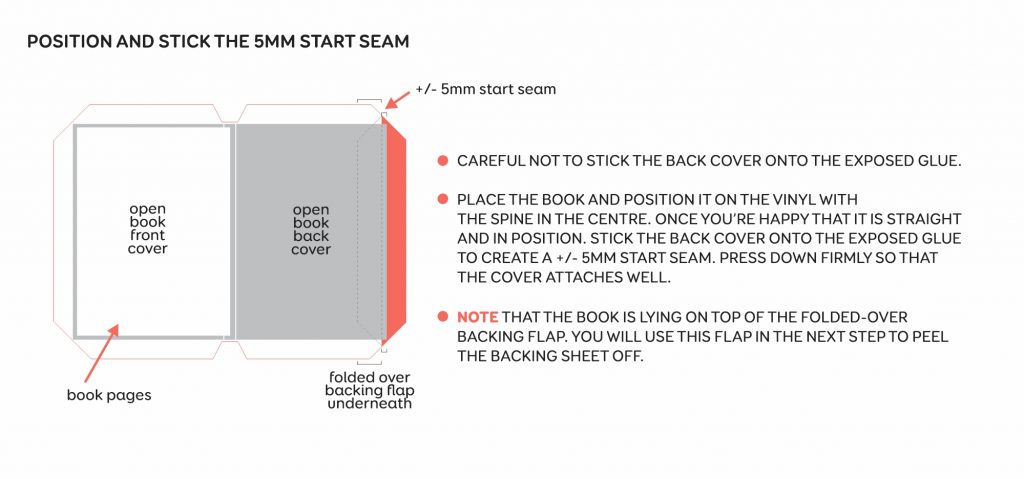
Be careful not to stick the back cover onto the exposed glue while you’re positioning the book or file.
Place the book and position it on the vinyl with the spine in the centre. Once you’re happy that it is straight and in position. stick the back cover onto the exposed glue to create a +/- 5mm start seam. Press down firmly so that the cover attaches well.
Note that the book is lying on top of the folded-over backing flap. you will use this flap in the next step to peel the backing sheet off.
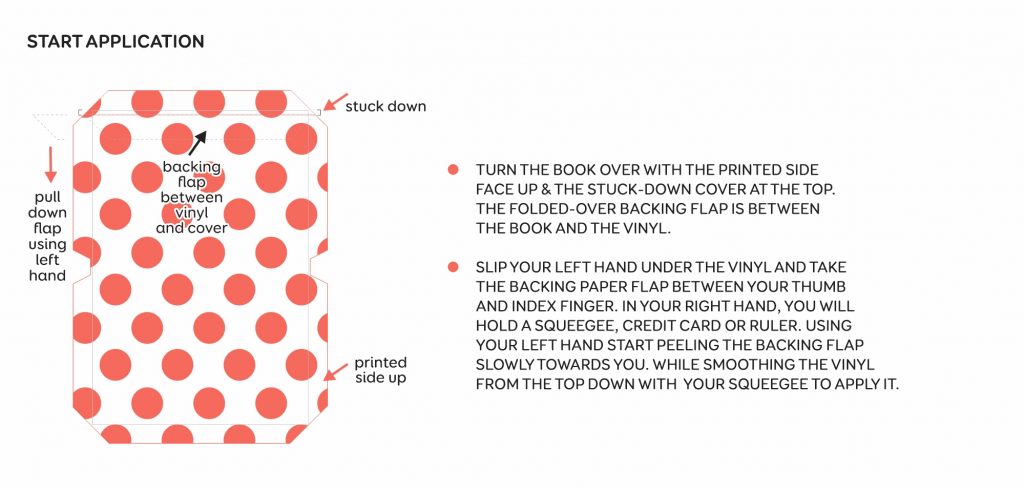
Turn the book over with the printed side face up & the stuck-down cover at the top. The folded-over backing flap is between the book and the vinyl.
Slip your left hand under the vinyl and take the backing paper flap between your thumb and index finger. In your right hand, you will
hold a squeegee, credit card or ruler. Using your left hand start peeling the backing flap slowly towards you. While smoothing the vinyl from the top down with your squeegee to apply it.
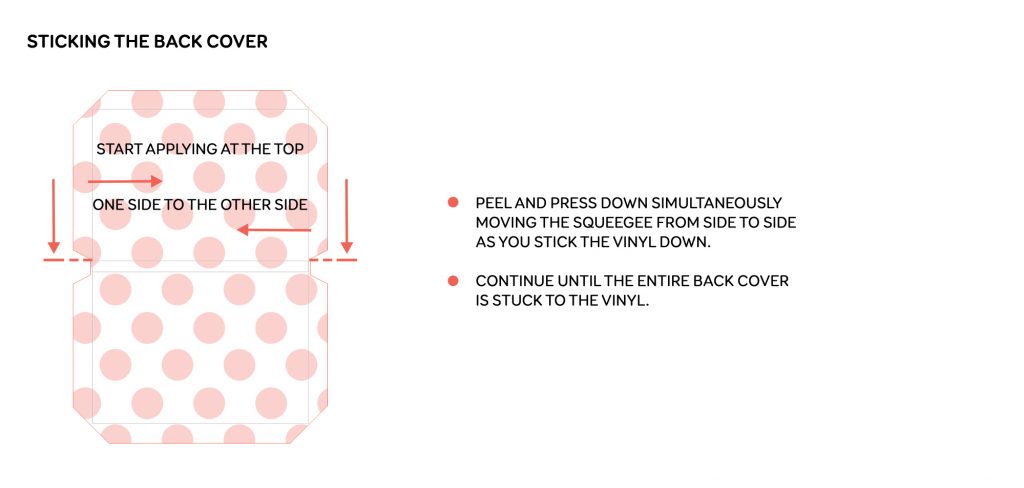
Peel and press down simultaneously moving the squeegee from side to side as you stick the vinyl down. Continue until the entire back cover is stuck to the vinyl.
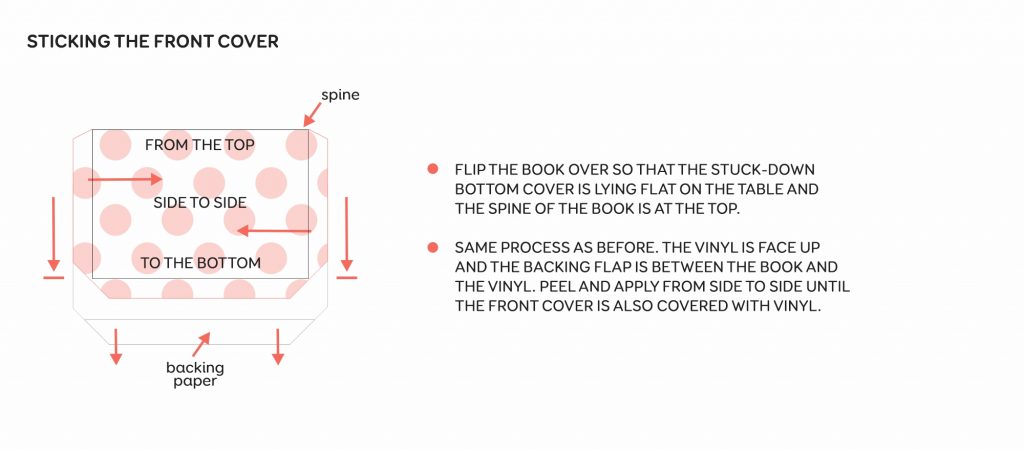
Flip the book over so that the stuck-down bottom cover is lying flat on the table and the spine of the book is at the top.
Same process as before. the vinyl is face up and the backing flap is between the book and the vinyl. Peel and apply from side to side until the front cover is also covered with vinyl.
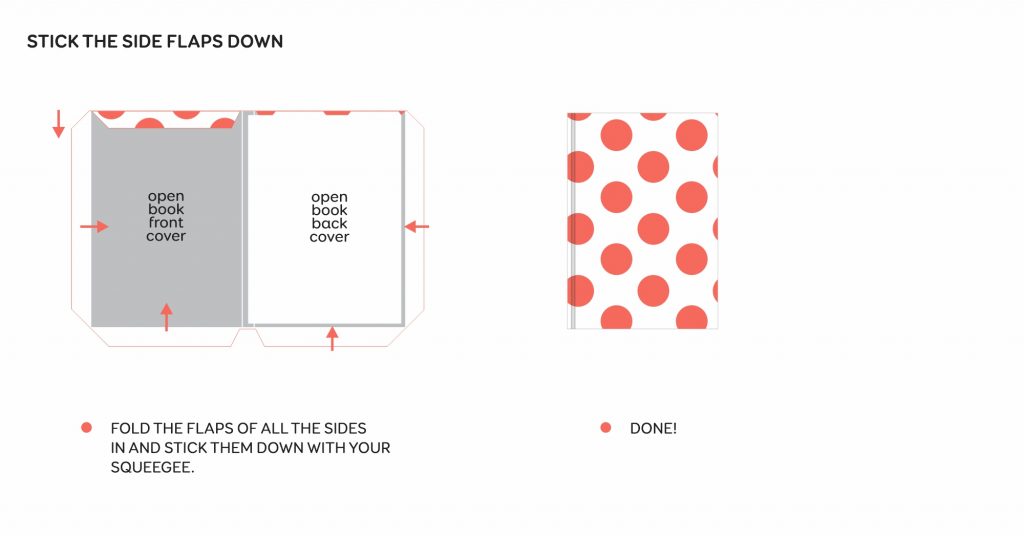
Fold the flaps of all the sides in and stick them down with your squeegee.
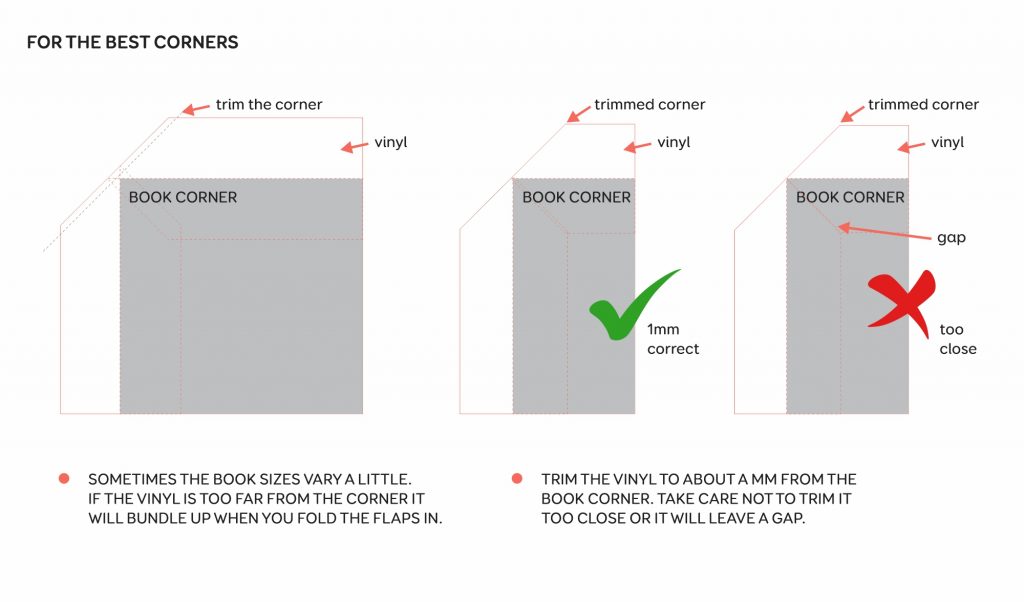
Sometimes the book sizes vary a little. If the vinyl is too far from the corner it will bundle up when you fold the flaps in.
Trim the vinyl to about 1 mm from the book corner. Take care not to trim it too close or it will leave a gap.
Vinyl wraps are a popular way to transform appliances like fridges, giving them a fresh, modern, or custom look without the permanence of paint. Vinyl’s special adhesive makes it easy to apply, reposition, and

Vinyl is a printable sticker material that has adhesive on the back which makes it easy to apply on any surface. Vinyl stickers are also known as sticky vinyl, vinyl decals or die-cut stickers.

Vinyl decals are a new trend and are being applied to many surfaces. Vinyl has an inherently special adhesive and can be applied to many surfaces such as glass, wood, metal, or plastic. They